Megan OwenI am a 17 year old senior at severn school. |
Back to Blog
Time to Paint5/12/2021 Throughout the restoration, until end of March, my dad and I planned on having the car professionally painted. When we contacted different painting companies, none fit the timeline. My dad and I made the decision to paint the car ourself. We sanded down the old paint on the car. This will ensure that the new paint will stick to the car. We found a couple places with black paint and filler under the top coat and primer. We sanded down the car to the first coat of primer. Once the car was completely sanded down, it was time to paint. We bought a giant blow up tent so we could paint in the drive way. We started with two coats of primer on the first day. Then we added two more. Four coats of white color and two coats of top coat will be sprayed onto the car by the end of this weekend (May 16)
0 Comments
Back to Blog
Installing the Engine3/26/2021 On March 15, my dad and I reinstalled the engine and transmission. When we took the engine out, we did not have the engine attached to the transmission. We were able to lift the engine straight out without many complications. Putting the engine in was slightly more difficult with the transmission at the back. We had to rent a large lift that would be able to hold the engine high enough. We tilted the engine so the transmission pointed down and lowered it in. We had to to up and down and forwards and backwards to fit the engine in properly. With the help of a couple neighbors the engine is now in the engine bay. We bought a new exhaust and cleaned the inlet manifolds to be added back onto the engine.
Back to Blog
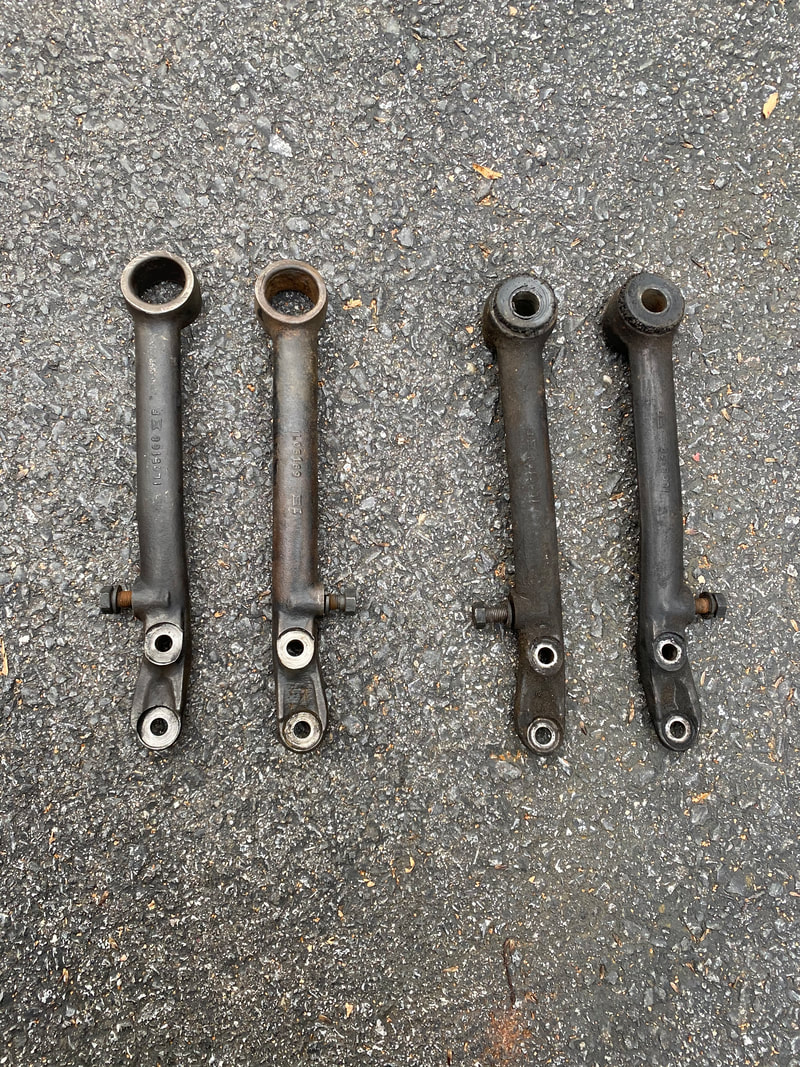
A Car with Suspension12/31/2020 In early November, the front suspension was removed and taken apart. The parts of the suspension were very dirty and needed to be clean and painted. We cleaned the parts fo the suspension using a wire brush. Once all the parts of the engine were cleaned, we suspended the parts and painted them black with a spray gun. We then added a top coat to the parts, which added a beautiful shine to the suspension parts. For the last month or so, my dad and I worked on putting the suspension back together. It took some extra hands, my brother, but the suspension was put back together. Right before Christmas, my brother, dad, and I put the suspension back onto the Mark 2. The suspension being removed from the Jaguar Mark 2. Each part of the suspension with one part clean and one part in original state. The suspension parts ready to be painted The suspension base after being painted. The suspension put together before going on the car. The Suspension back on the car.
Back to Blog
Starting the Interior12/31/2020 Working on the wire loom meant that the dashboard had to be removed from the interior of the car. My dad and I. decided to start working on the dashboard, so when the wiring is finished we can add the finished wood to the dashboard. We started by removing all the metal parts connected to the interior. This included the speedometer, fuel gauge and the glove compartment. We then removed the varnish off of the wood by scraping it off then sanding the wood down. We are now adding new varnish onto the wood pieces of the dash board.
Back to Blog
Finishing the Engine11/9/2020 The new valve and shims arrived and were put on the engine head. When we tested the shims on one side, we loosened the camshaft on the other side to avoid breaking another valve. Once all the shims have the correct clearance, four thousandths of an inch for the exhaust and six thousandths of an inch for the inlet, we matched the timing of the inlet and exhaust. Then, we bolted the camshafts onto the cylinder head. We painted the cylinder head metallic blue, the stock color for all cylinder heads on Jaguar Mark 2s. The timing gear and cylinder heads were timed together. It is important to make the timing of the pistons and the valves align to ensure that the engine will work properly. There was trouble connecting the timing gear to the camshafts because there is little adjusting movement for the timing gear. We were able to connect the timing gear to the camshaft and when we tested the timing, it was perfect! Other than a couple small additions, like the oil pipe, the engine is completed.
Back to Blog
A Broken Valve11/6/2020 The last part of the engine to complete is the cylinder head. The valves have been ground and the crankshafts have been professionally cleaned. My dad and I tested the valves and ground the valves more the make sure there were no leaks.
The last step before adding the cylinder head to the engine block is to test the clearance of the shims of the valves. To do this, you put the crankshaft on the valves and turn them. When the valves are closed completely you test the clearance of the shim cover and the crankshaft. We tested all of the shims and ended up needing a new set. While testing the clearance for both exhaust and inlet valves, we left the exhaust crankshaft on. This meant that some of the valves were pushed open and some were closed. While we were testing the inlet clearance, one of the valves pushed the corresponding exhaust valve. This caused the valve to bend. We were unable to bend it bank. A new valve is needed along with a new set of shims. This caused a small setback in the timeline for the engine. When the shims and valve arrive, we will complete the cylinder head and put it onto the engine block.
Back to Blog
Time to Paint9/23/2020 A couple weeks ago, the engine bay had been cleaned in preparation for painting. The transmission and front suspension was then removed to make the rest of the cleaning easier. We then cleaned where the transmission would be. Now is preparation for painting. Primer will be sprayed onto the engine bay and transmission area. My family's garage has a set up for properly painting a car. I will be the one to prime the engine bay with the help of my dad, bu my dad will be the one to actually paint the engine bay. The engine bay is scheduled to be completely painted by October 1st. 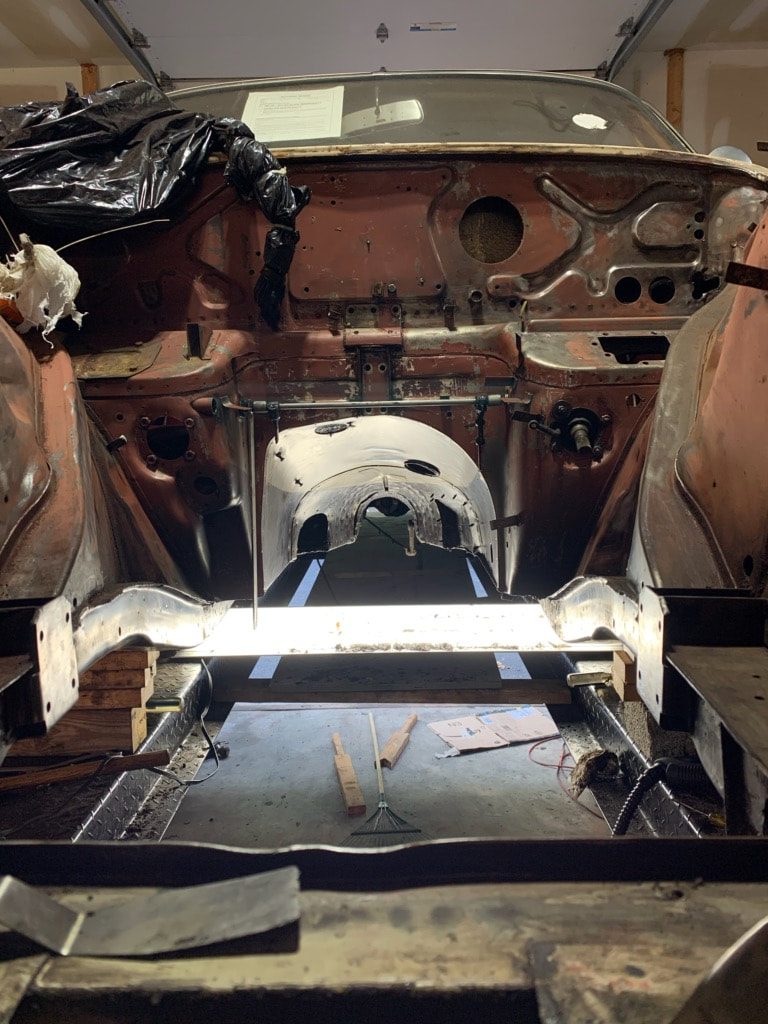
Back to Blog
The Broken Bolt8/31/2020 About a month ago, when working on the timing gear of the engine, I broke a bolt. It was the bolts to hold the timing gear cover onto the engine block. My dad told me there's nothing to worry about it since we could easily order the bolt online.
A week after we ordered the bolt, my dad got an e-mail saying that the boat was on back order and it had to come from the manufacturer from England. This caused a little set back because we cant put the engine into the engine by without this bolt. We were hopeful that the bolt would come before needed to put the engine back into the engine bay. MyMy dad got another email from the company last week saying that the bolt is completely out of stock. My dad and I decided that we would make the bolt ourselves. We bought a three foot threaded rod the thickness of the broken bolt. we added a head to the rod and cut it the length we needed. we attached the bolt onto the timing gear cover. To finish the engine, the engine head needs to be painted then put onto the engine block. After that, the engine is ready to go back into the engine bay.
Back to Blog
The Big Removal8/22/2020 After cleaning and preparing most of the engine bay for painting, my dad and I decided that we need to remove the front suspension of the car. Removing the front suspension will allow us to easily clean the bottom of the engine bay and the underside of the car. To remove the front suspension, we started by unbolting each part connected to the frame. My dad added jacks to each side of of the frame and suspension. We removed the front wheels and lowered the suspension to sit onto the lift. There were a couple hiccups along the way. One jack holding the shell shifted when the right side of the suspension was lowered. We had to stop working on the suspension and fix the jack so the car shell doesn't get damage. After a couple hiccups, the suspension was removed from the car. We used our car lift, moving it up and down, to move the suspension onto the floor and off the lift. The suspension needs to be completly stripped and cleaned. The rubber parts are rotted and the suspension is completely covered in oil.
Back to Blog
Oh Boy is it Dirty!7/31/2020 After the transmission was dropped, the next step in the restoration process is preparing the engine bay for cleaning and repainting. Before we even started the restoration, my dad and I noticed how oily the entire engine bay was. Most of the bay was covered in 1-3 mm of pure oil. Even the ancillary components were covered in oil. To prepare the engine bay for cleaning and repainting, all the ancillary components need to be removed. Also, all the wiring needs to be labelled and photographed to ensure the wires are put back in the correct way. My father and I created labels and labeled all the wires. In total, there was an excess of 70 wires. While I was labelling wires, my dad worked on removing the ancillary components in the engine bay. My dad removed components including the windscreen wiper motor, break servo, and electrical control box. As we were working on removing the components in the engine bay, we noticed non standard additions to the car, which will be removed to enhance authenticity. In the next few days, my dad and I will be removing the oil using a steam cleaner. |
 RSS Feed